Instrument setup#
Hardware setup#
Controller setup#
The CS20 controller units have a power putton as part of the keyboard. Prior to using it, turn it around and insert a compatible battery in the battery slot in the backside of the unit. Once done, close and lock the cover and insert an SD on the bottom side of the controller unit. This, too, is covered by a lockable cover. Lock it after the SD card has been inserted. Then proceed by powering on the device and follow the instructions laid out in Software Setup.
Tripod setup#
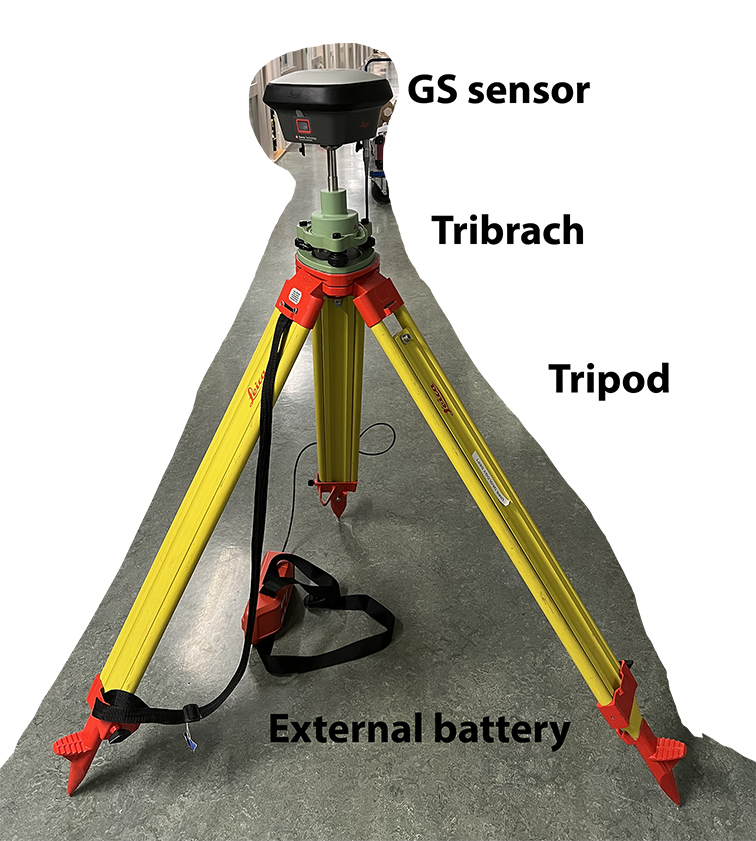
Fig. 1 The tripod setup in its most basic form (missing the height hook and having the battery on the floor).#
The tripod setup is typically used when measuring the same location over longer time periods, such as when measuring in base station mode. Proceed by setting up the tripod as level as possible. Then mount and level the tribrach, ensuring the tribrach is over the marker. Then place and lock the carier in the tribrach and screw the GS sensor onto the carrier pin. Once again, double check that the tribrach is still level. If using the external battery, hang it onto a tripod leg. Then attach the height hook into the carrier and measure the antenna height using the height hook. You are then ready to start the GS sensor.
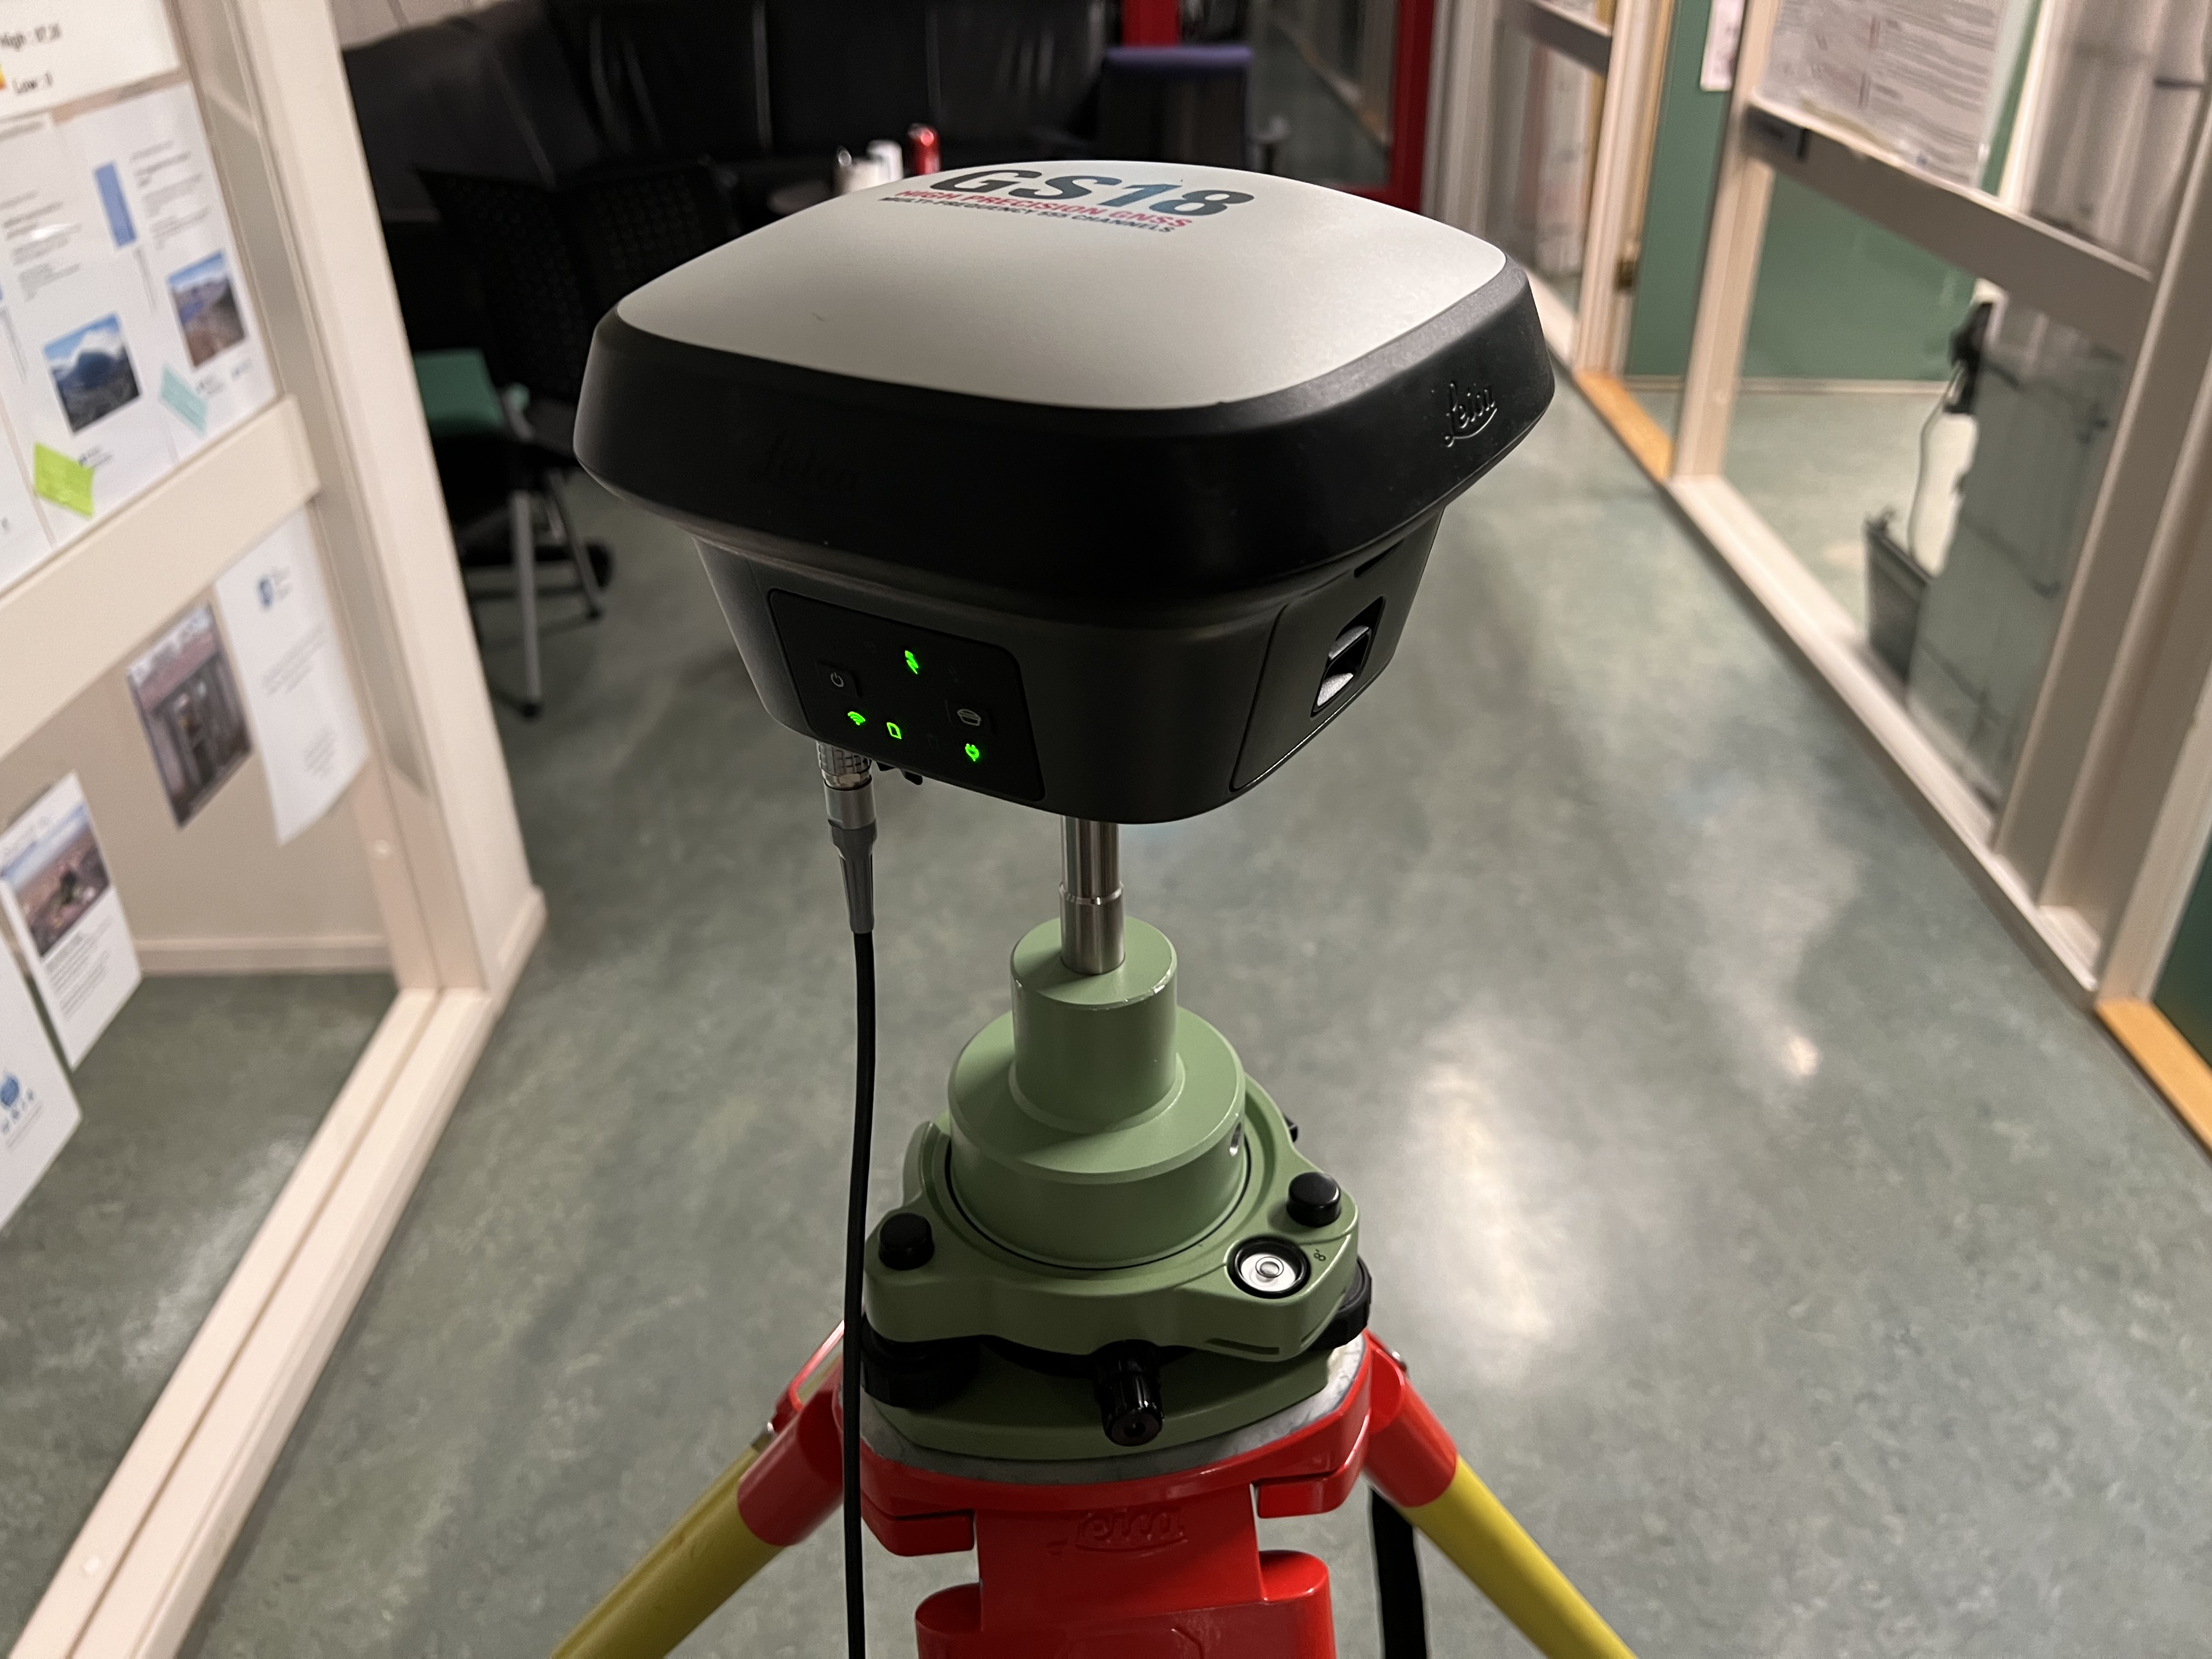
Fig. 2 The tripod setup in its most basic form (missing the height hook and having the battery on the floor).#
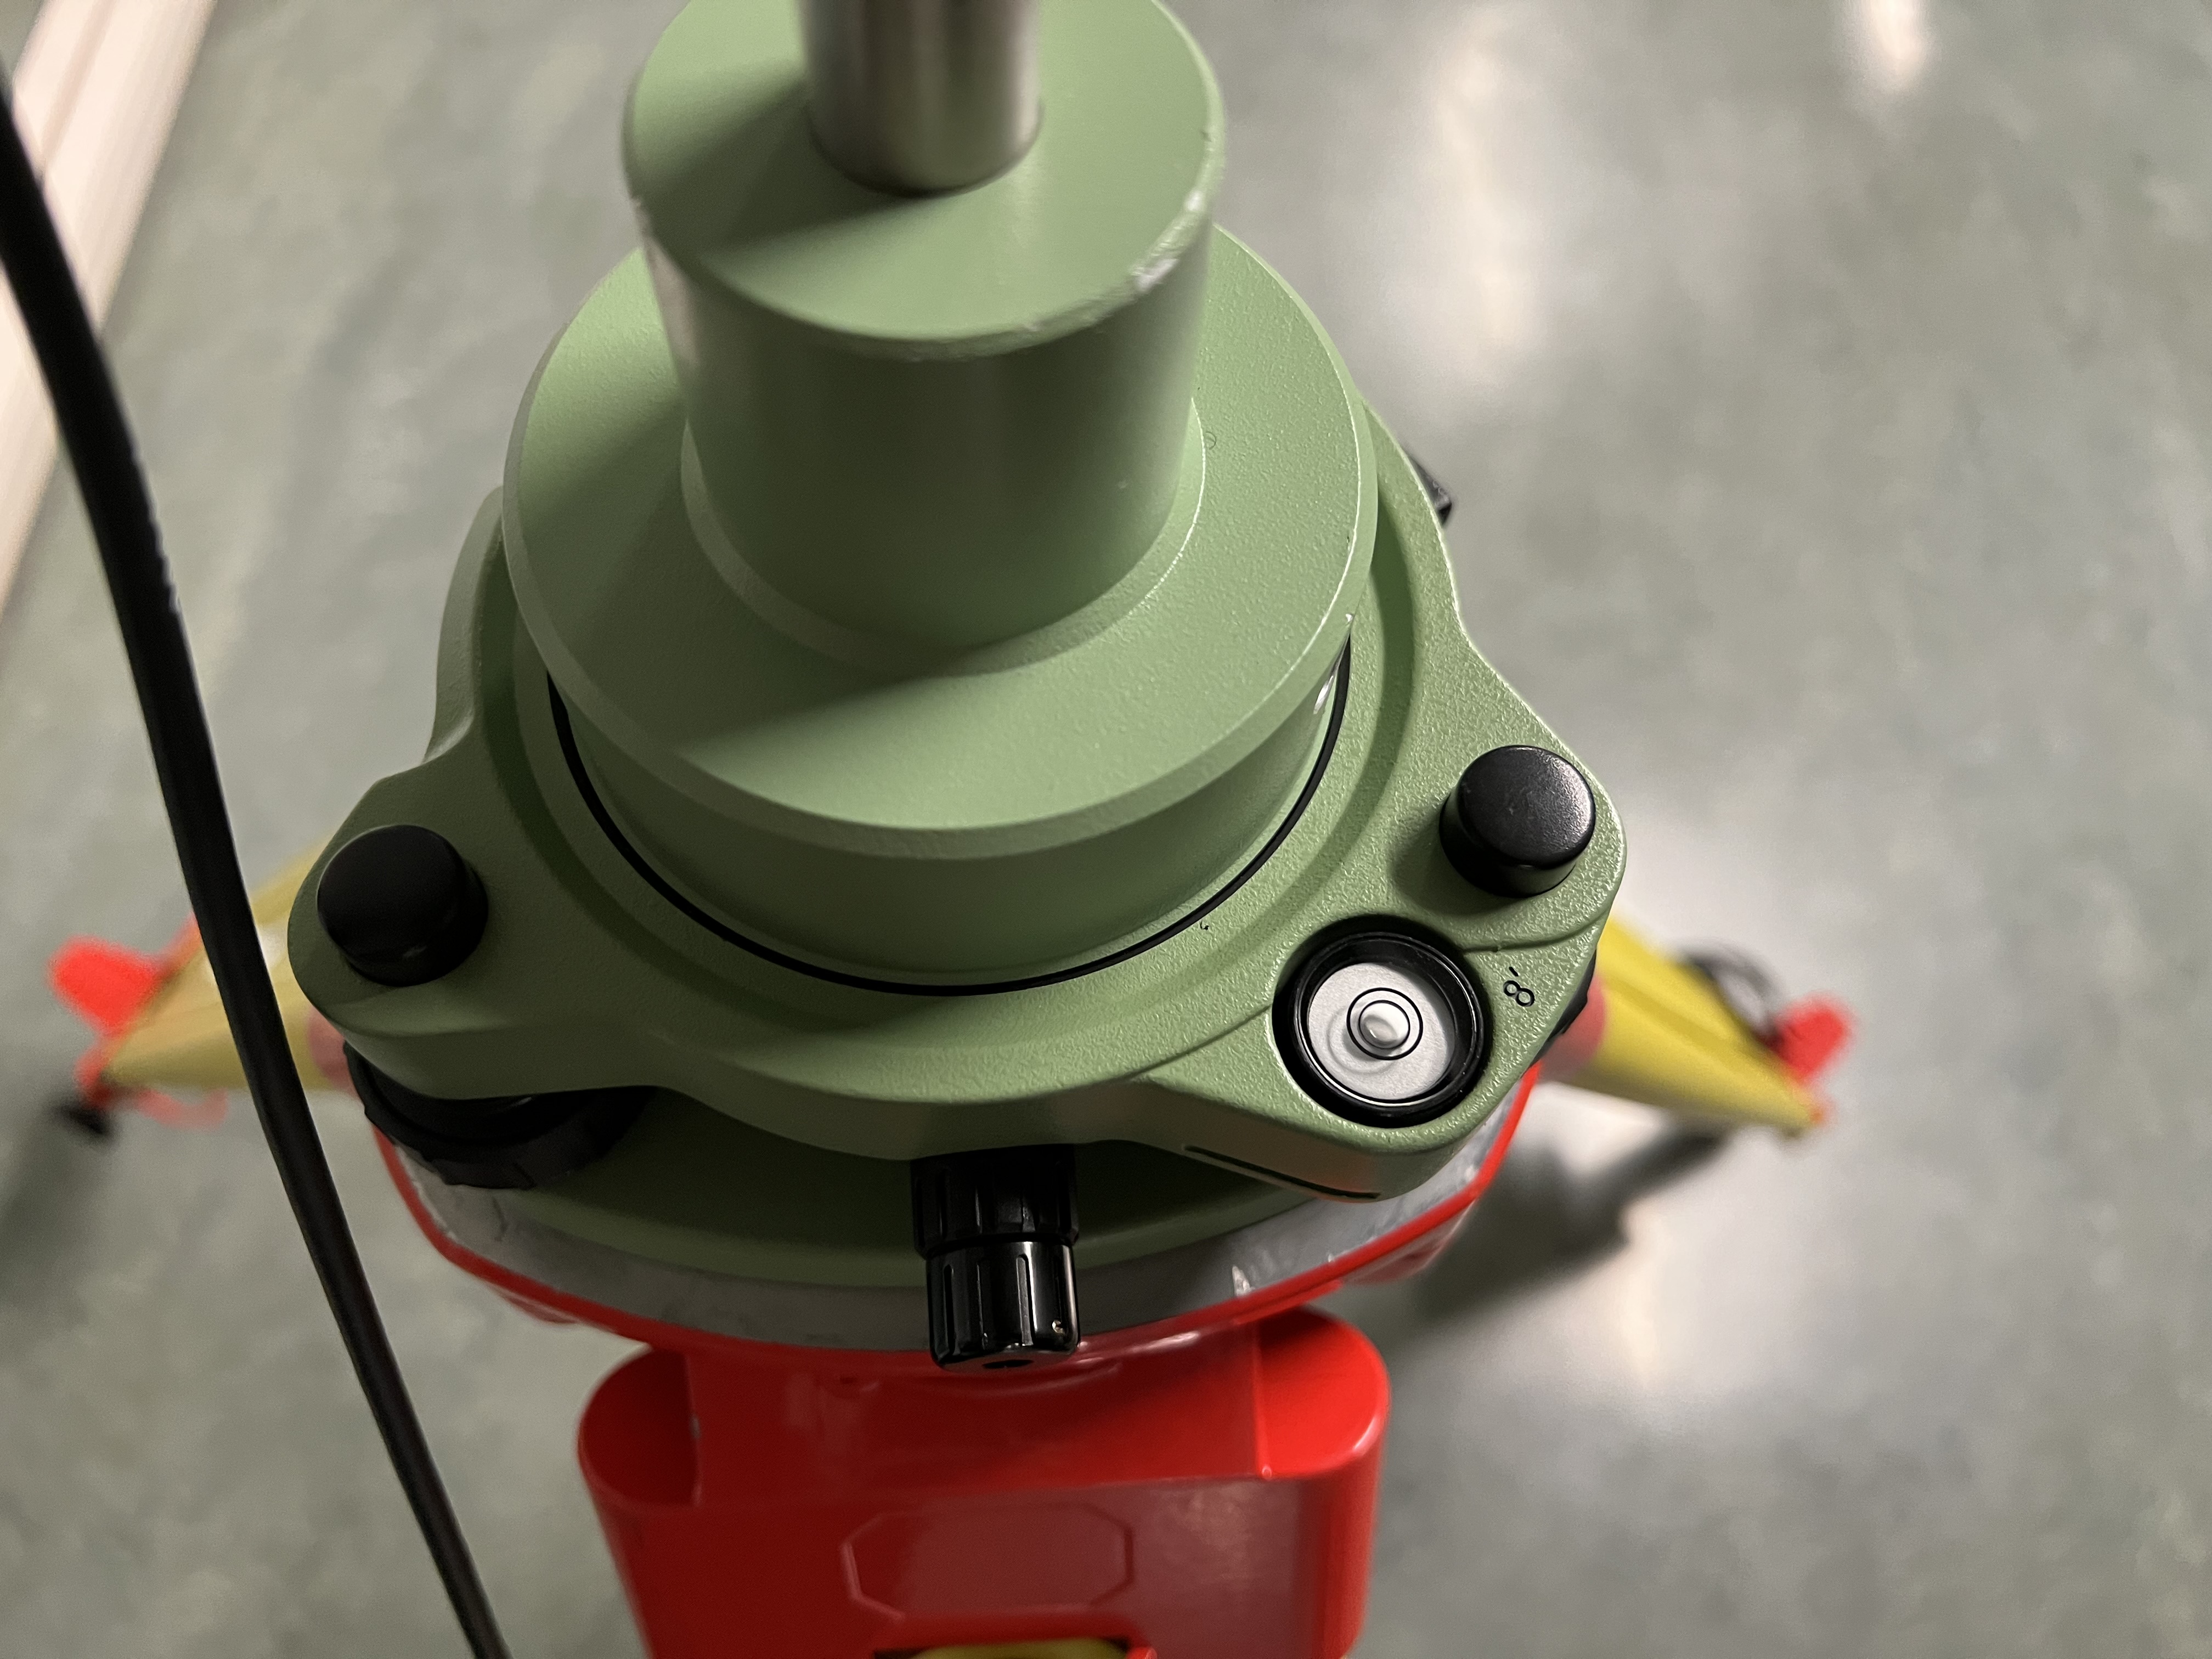
Fig. 3 The tripod setup in its most basic form (missing the height hook and having the battery on the floor).#
Step-by-step in the manual
A step-by-step equipment setup is also provided in the manual. Please refer to page 32-36 of the GS16 manual):
http://www.surveyteq.com/uploads/p_27AADE49-4B3B-AC7D-F9FB-C27769D1D218-1517301401.pdf
Alternatively, please refer to page 28/29 of the GS18 manual):
http://www.surveyteq.com/uploads/p_D8C5E8F5-8F71-A298-3851-2E6051F80551-1608202889.pdf
Single pole setup#
The pole setup is more mobile than the tripod setup and the given choice for the rover. Attach the GS sensor to the pole. Lock the pole in a fixed position (e.g. 1.8 m or 2 m), and turn the sensor on (see Sensor startup). When measuring, always make sure to keep the pole as level as possible.
Step-by-step in the manual
A step-by-step equipment setup is also provided in the manual. Please refer to page 28-31 of the GS16 manual):
http://www.surveyteq.com/uploads/p_27AADE49-4B3B-AC7D-F9FB-C27769D1D218-1517301401.pdf
Alternatively, please refer to page 29-33 of the GS18 manual):
http://www.surveyteq.com/uploads/p_D8C5E8F5-8F71-A298-3851-2E6051F80551-1608202889.pdf
Controller startup#
Besides the steps outlined in Controller setup, not much more can be done to start up the controller. Simply press and hold the power putton until the controller starts up. Then proceed with the next sections on how to start the GS sensors. The interface of Leica Captivate (the software running on the CS20 controllers) is detailed in GNSS Data acquisition with Leica Captivate.
Do not cross-pair the controllers to the sensors
Both CS20 controllers and the GS16 and GS18 sensor units are marked to indicate their standard pairing; i.e., a set of controller with GSxx sensor. Out of experience, it is best to keep the standard pairs, and only connect to the GS16 sensor with the CS20 3.75 controller and the GS18 sensor to the CS20 4G controller - otherwise you will find yourself lost in a barrage of connection losses, etc.
Sensor startup#
Although similar in appearance, the GS16 and GS18 sensors have slightly different operating procedures and specifications. This also extends to the location of the battery and (micro)SD card slot readers. The videos below highlight where and how to insert the (micro)SD cards and batteries into the respective sensors.
Available through YouTube.
Available through YouTube.
The GS16 and GS18 have distinctive icons next to the power button that inform you about the mode of operation, power levels, and more.
Fig. 4 The GS16 icons are more straightforward than those on the GS18. From left to right along the top arch: Bluetooth/Wireless connection, SD card activity, positioning, base station mode/transmitting, rover mode/receiving. The battery icon and power cable represent battery level and external power, respectively.#
Image modified from the Leica GS16 manual.
Fig. 5 Top row from left to right: GNSS positioning, tilt correction, base station mode, rover (receiver) mode. Then follow the power button (left) and operations mode button (right), followed by left to right: WiFi (and BlueTooth), SD card (blink = writing data), battery level, external power supply.#
Software Setup#
Connecting and configuring the GS Sensor#
Once the sensor and controller have been turned on and mounted on the poles, you will need to connect the controller with the sensors, specifying the correct/absolute height of the sensor above the measuring point.
Available through YouTube.
After successfully connecting to the sensor, you should double-check the sensor settings, including the correct sensor height parameters, which GNSS network to use (e.g., GPS, GLONASS, BeiDou, Galileo), and more. Finally, it is crucial to store the raw data if you want to apply post-processing. This requires the raw data to be stored at 1.0s intervals.
Available through YouTube.
Enable base station mode#
The Leica GS sensors can be easily turned into a portable base station. Simply connect to the sensor from with Leica Captivate, then proceed by clicking Switch to base (3). Within a few seconds, the base station starts recording and storing the data.
Make sure to proceed with the Base Setup (1). For most purposes, it suffices to specify data acquisition Over any point (3), which then prompts for the antenna parameters and a Point ID. The Point ID represents the name of the base station. Give it a unique name that allows you to find it on the SD card.
Available through YouTube.
After finalising the initial setup, proceed to the Settings (2) menu. Specifically, modify the Satellite Tracking (1) and GNSS raw data logging (2) parameters found within the GS base (1) menu. Always enable GNS, Glonass and Galileo for tracking - BeiDou is not supported. Also make sure to Log GNSS raw data and Store data on the GS sensor SD card at 1.0s intervals. The Leica format (MDB) is supported by the Leica Infinity software, which can also export it in different formats.
Switching the GS sensor back to rover mode is easy - just click Switch to rover (3) when done in base mode.