Post-kinematic processing: Leica Infinity#
Infinity Software Version
The following tutorial is based on Leica Infinity software version 4.0.0. Minor changes may be expected when newer versions are used.
Work in progress
This page is still being updated. Help is more than welcome - please edit this page (see Fig. 13).
UNIS Leica Infinity Licenser Server address
A Leica Infinity License Server is available at the following endpoint:
leica-license.unis.no
Create a project#
Unless a project was previously made, Leica Infinity requires you to set up a new project. Proceed by opening the New Project tab from the main side menu. As depicted in Fig. 7, fill out the project name, owner, and other metadata; then click Create.
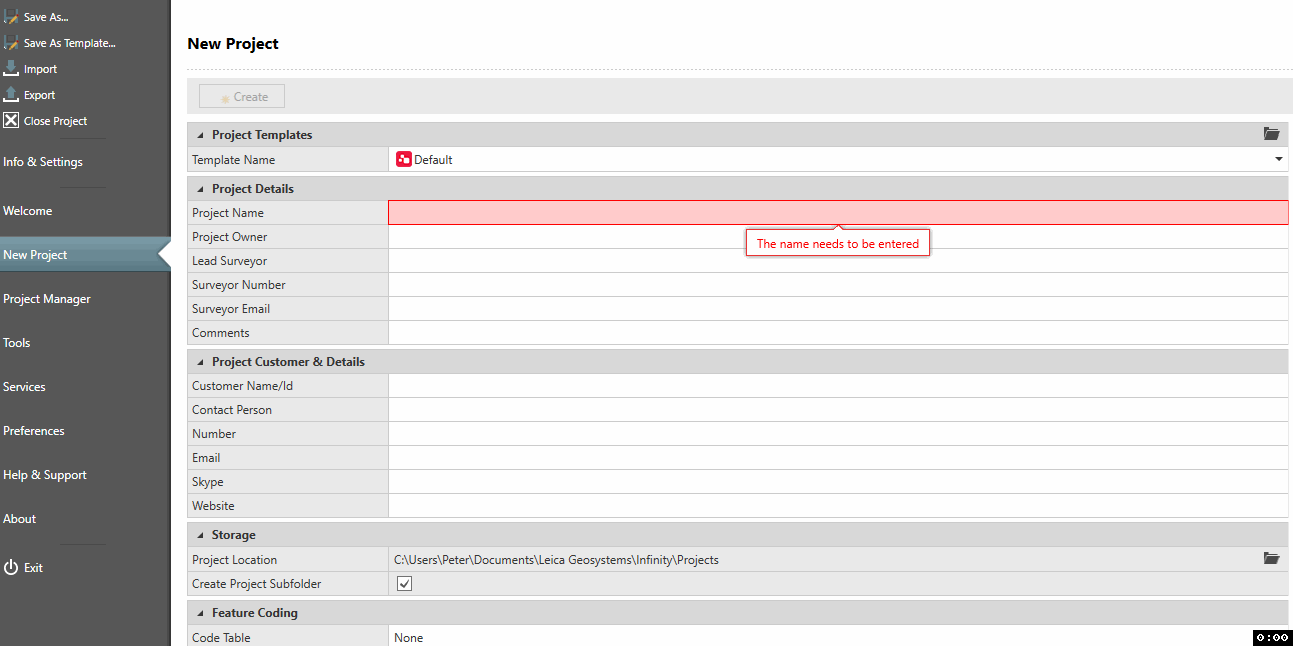
Fig. 7 Create a new project from scratch in Leica Infinity.#
You are then ready to proceed with changing the project’s coordinate reference system (crs), importing data, adding ellipsoid to orthogonal height corrections, and more.
Transfering GNSS data from Captivate into Infinity#
Before accessing the measured GNSS data in Leica Infinity, the measurements need to be transferred over from the controller to the computer. First, transfer the Job data from the internal memory of the controller to the SD card, using Leica Captivate (i.e., the controller software).
Available through YouTube.
The Leica CS20s have the SD card at the bottom-side of the controller unit.
Simply take off the protective slide, and take out the SD card.
A warning may pop up in case a non-Leica SD card is used.
This should not affect anything; if possible, use a lower-capacity SD card that can be formatted as FAT32 to circumvent this issue.
Then connect the SD card to the computer, and drag and drop the .m00 file into the Navigator panel of Leica Infinity.
The .m00 file is found within the DBX directory on the SD card, under the job-name directory.
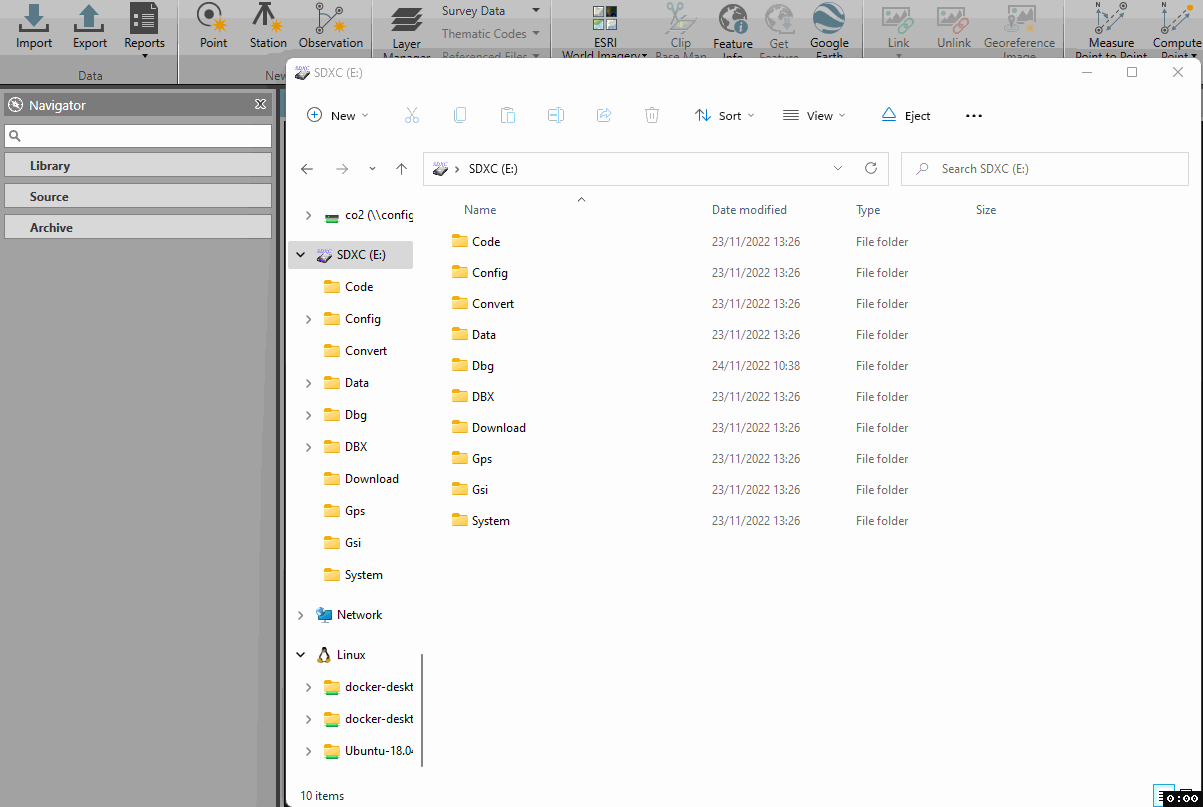
Fig. 8 Importing raw GNSS rover data from the SD card.#
Importing GNSS data into Infinity#
Once the raw GNSS data have been imported, do the same with the reference data from the base or control station. Permanent base station data can be obtained from e.g. Kartverket, as detailed in Downloading base station GNSS data. Drag and drop the data into the same panel.

Fig. 9 Importing GNSS reference data from a base station.#
With both raw and reference GNSS data available, the data can now be processed.
Processing#
Proceed to the Inspector view, then press the GNSS tab within the Inspector panel. You should then be able to set the Point Role. Select the reference data set, go to the Processing tab in the main menu, then click the GNSS icon for more option. Specify Reference for the reference data; then repeat the same for all measurements, specifying Rover for each. Finally, apply post-kinematic processing by clicking GNSS > Process.
Before proceeding, it is important to save the processing result! Right click the data and select Store to make the processing results permanent.
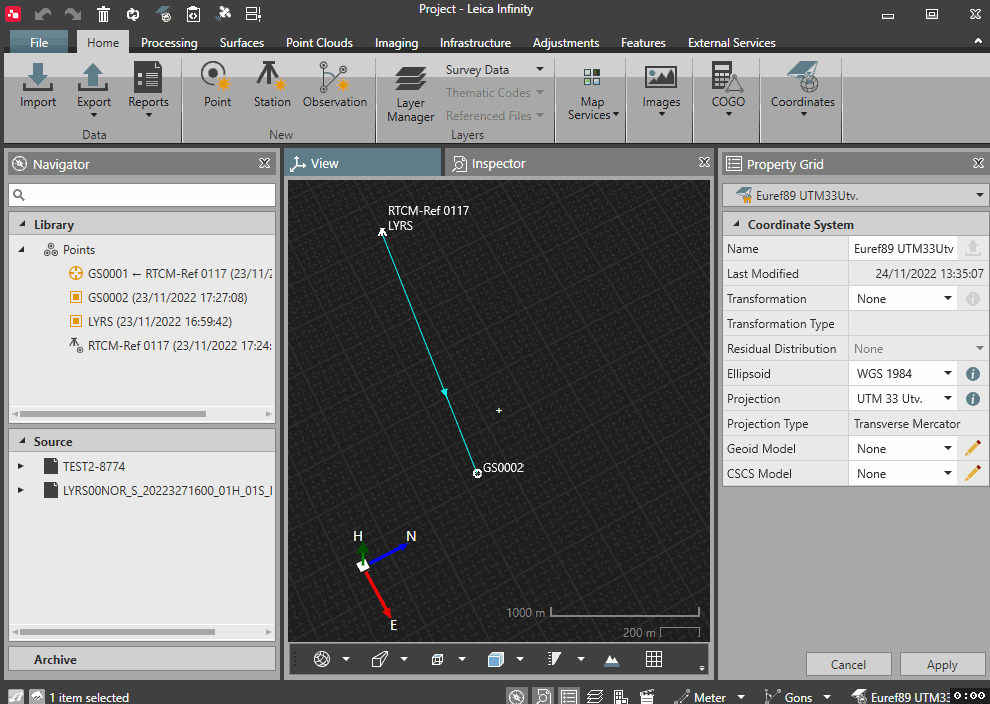
Fig. 10 Select rover and base data, assign their roles, and then process the data.#
The processing report can be accessed by right clicking a data point, subsequently Reports > Summary. This report has key data on the accuracy and solution type of the processed data. Always provide the processing report along with the processed data.
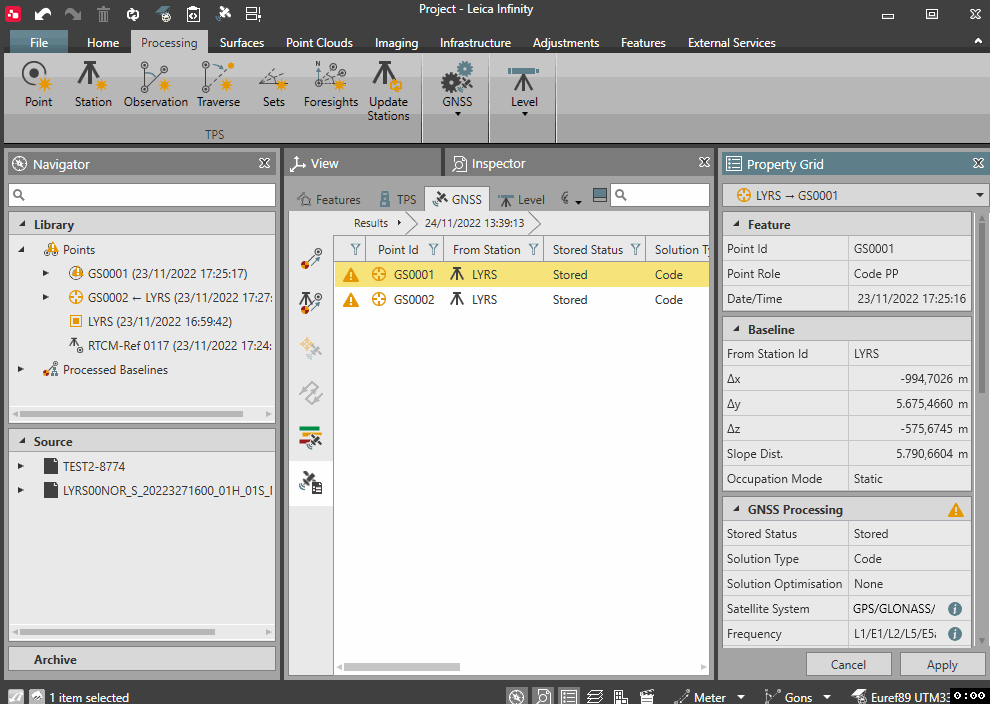
Fig. 11 Exporting of processing reports should be standard procedure for any and all processing. Only then are all the meta- and paradata correctly reported and documented.#
Data can be exported by selecting all points of interest, and then right clicking the selection. Save the data by clicking Save as…, specifying the location for where the data should be stored.
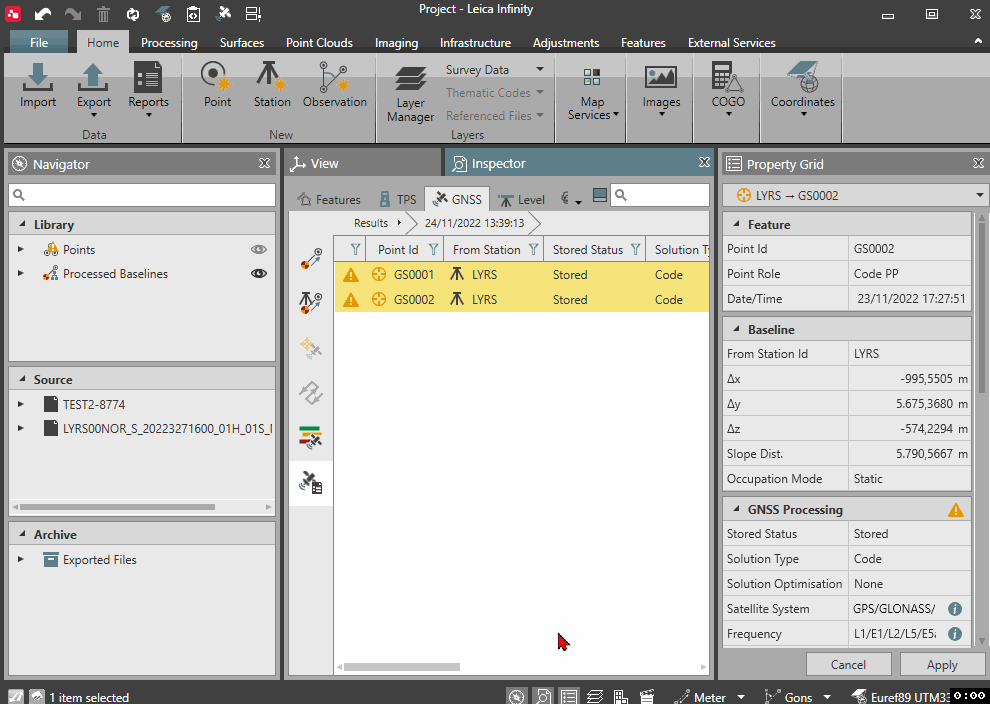
Fig. 12 Export the processed data points in csv format, including errors and coordinates.#
Using the Export button
Data may also be exported in a variety of formats by clicking on the Export button in the main menu (under the Home tab). However, be aware that data exported in this manner does not provide all the details of the suggested approach above.