ArcGIS Story Maps#
ArcGIS StoryMaps is a story-authoring web-based application that enables you to share your maps in the context of narrative text and other multimedia content. StoryMaps is very intuitive.
It is an ESRI product, highly linked with ArcGIS -see GIS 101 section for reference-, and therefore, it requires a license.
Data source
This page contains bits and pieces from all over the internet, supplemented by work by Peter Betlem, Tom Birchall, and Nil Rodes.
Sign in#
To create your StoryMaps go to https://storymaps.arcgis.com/ and sign in. Use your UNIS account to sign in. To do so, select Your ArcGIS organization’s URL and write unis78.
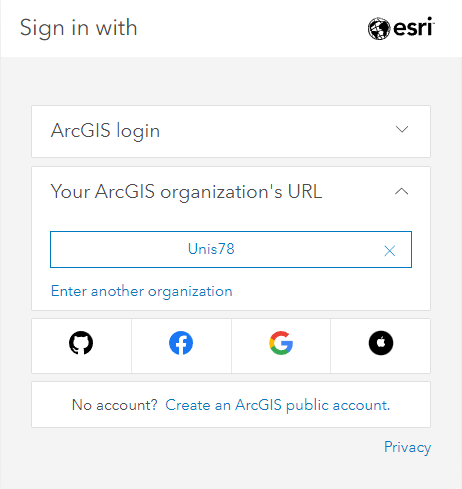
After that, use your UNIS credentials.
Warning
The username is studentnumber@student.unis.no. The password was defined by you when generating your UNIS ESRI account. Unless you used the same, the prestablished UNIS password will NOT work.
Create a new story#
You will start creating a New story. Start from scratch is the best option.
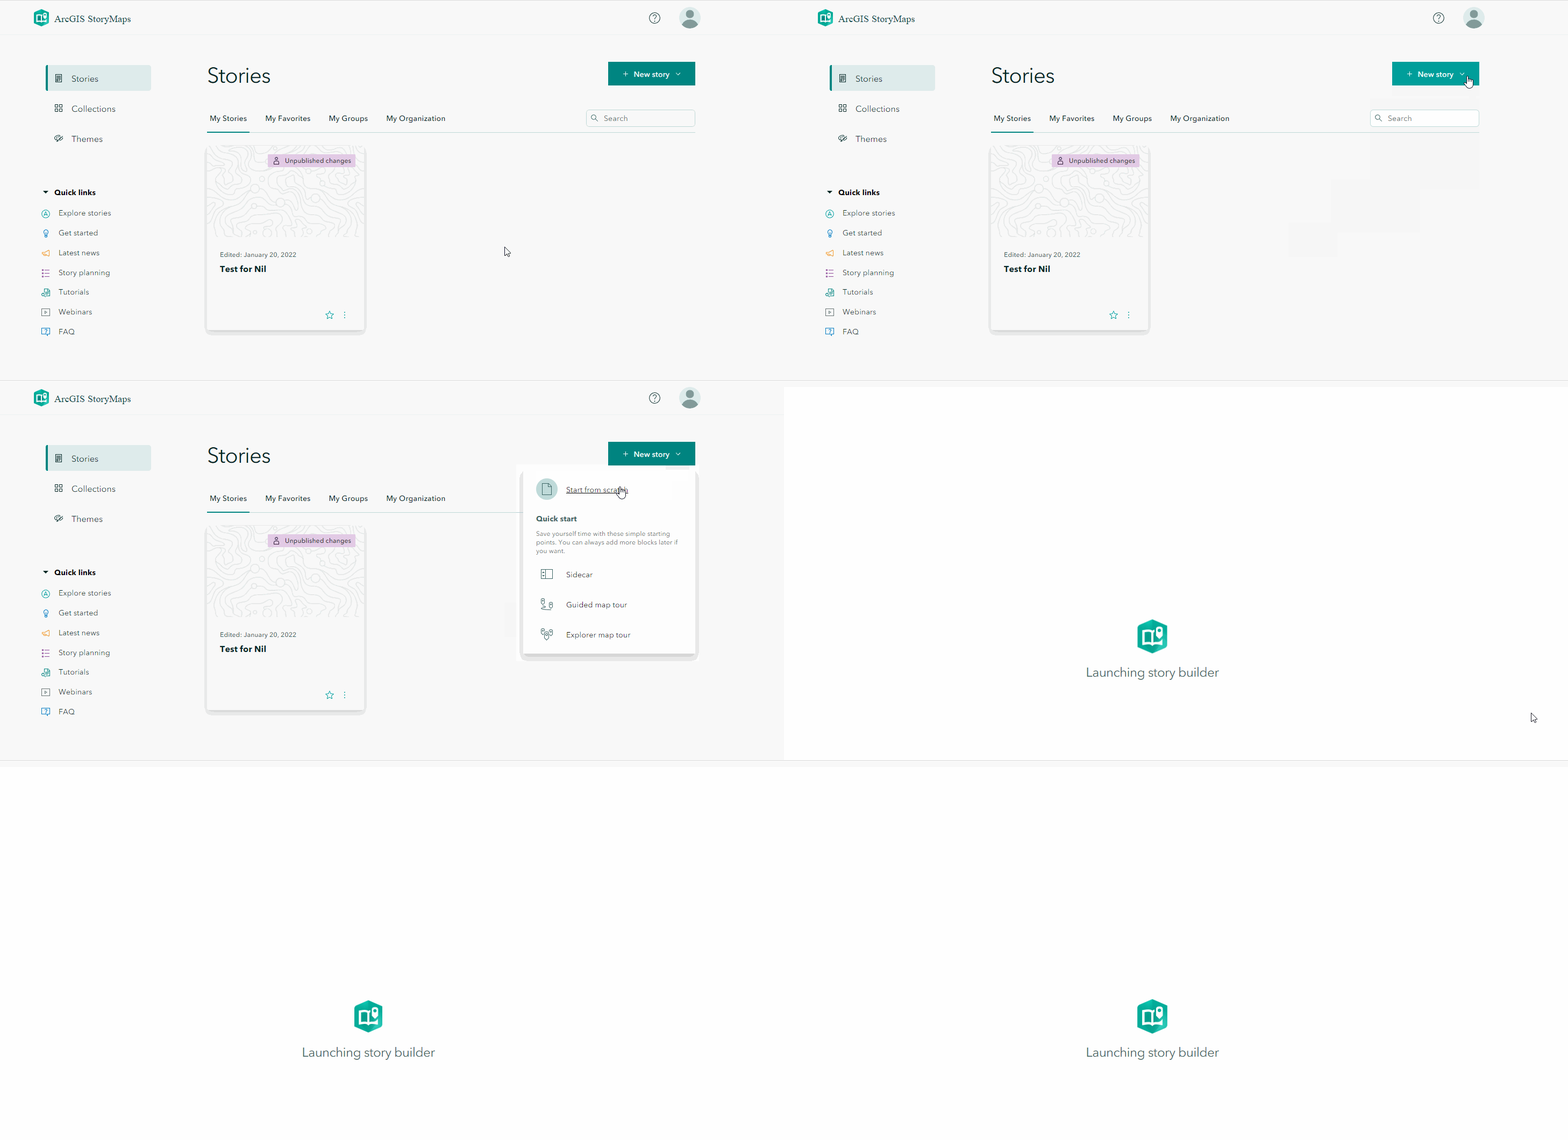
Once you have created a bank template, simply add different sections.
The story is automatically set up with a title and subheading. You can simply click on these and type (this isn’t very customizable, but looks quite good anyway).
We can add a variety of objects, either from our own PC or using a hyperink.
Suggestion
It is suggested uploading from your own PC, except for embedding the geomodel.
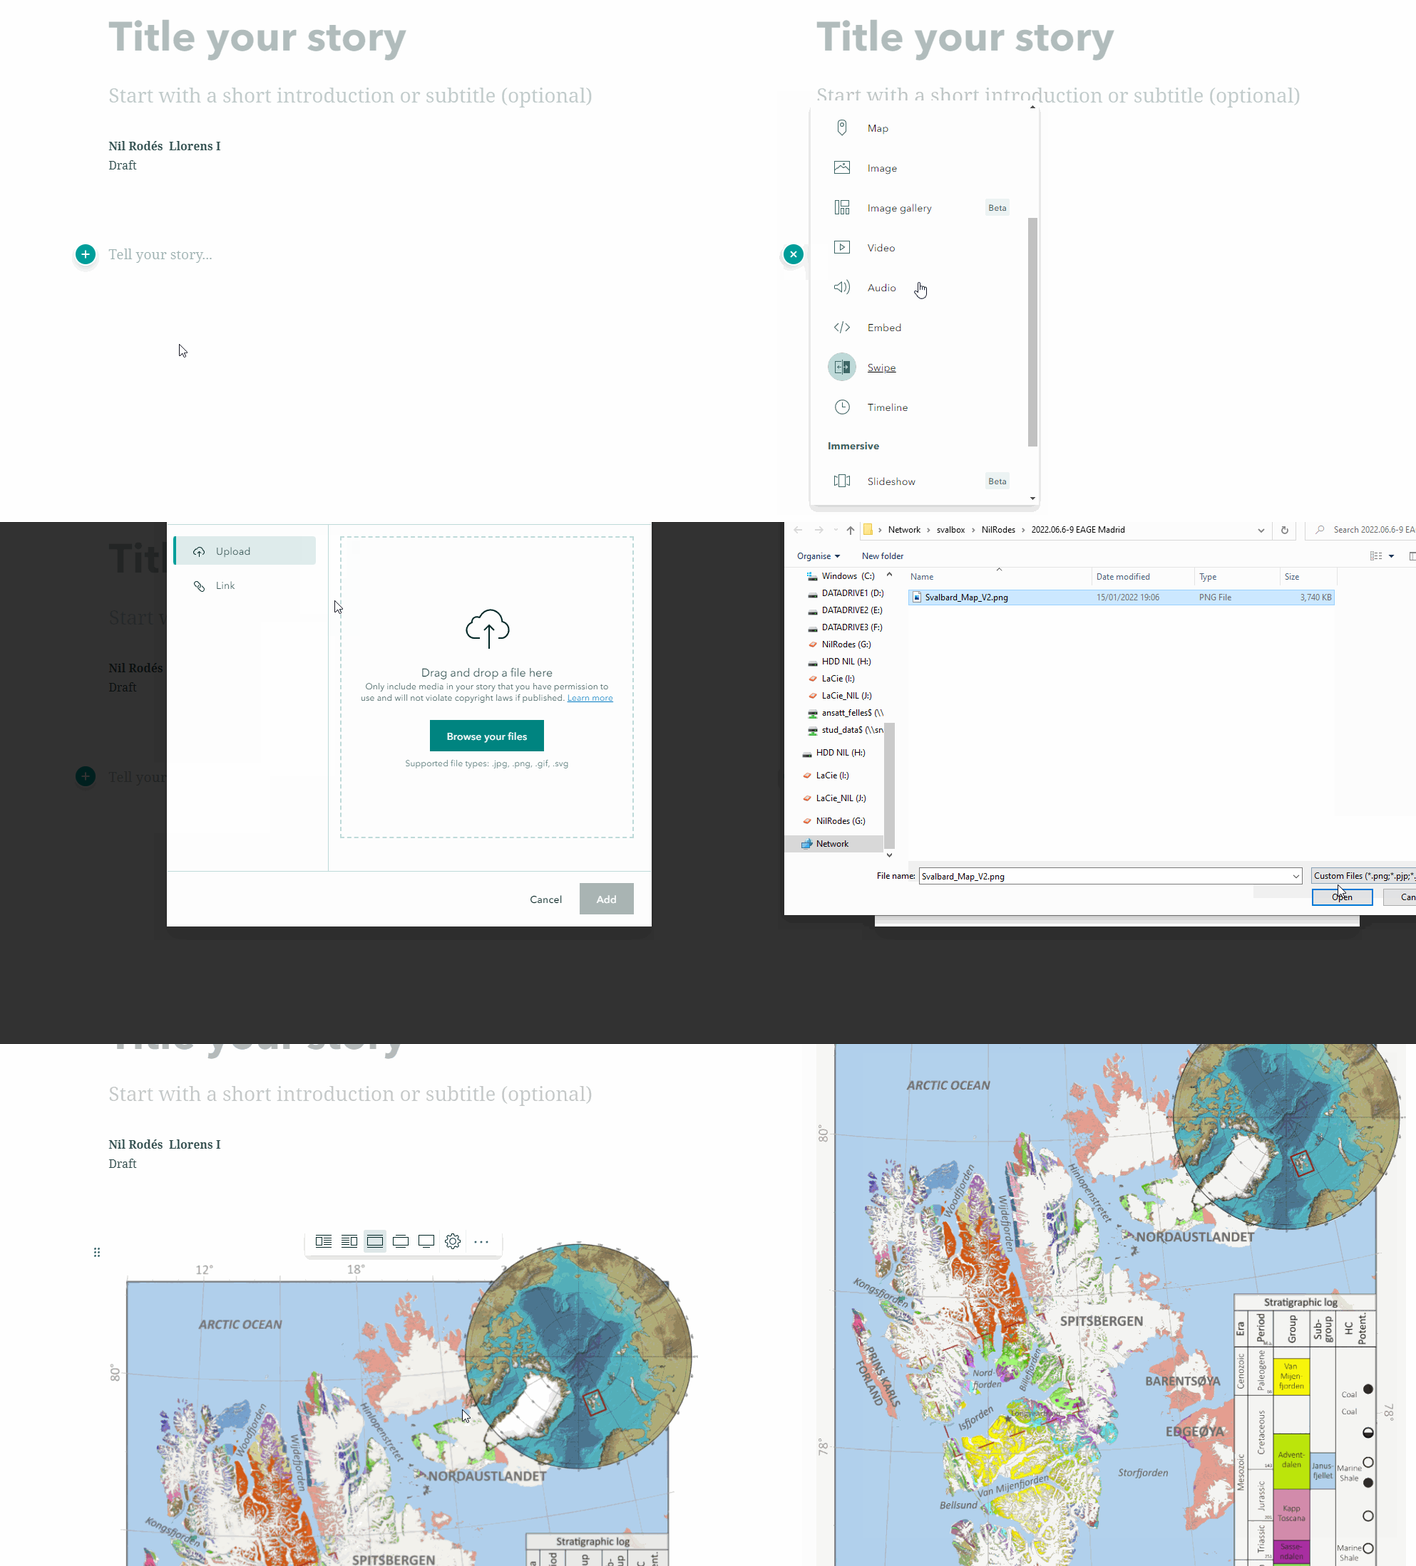
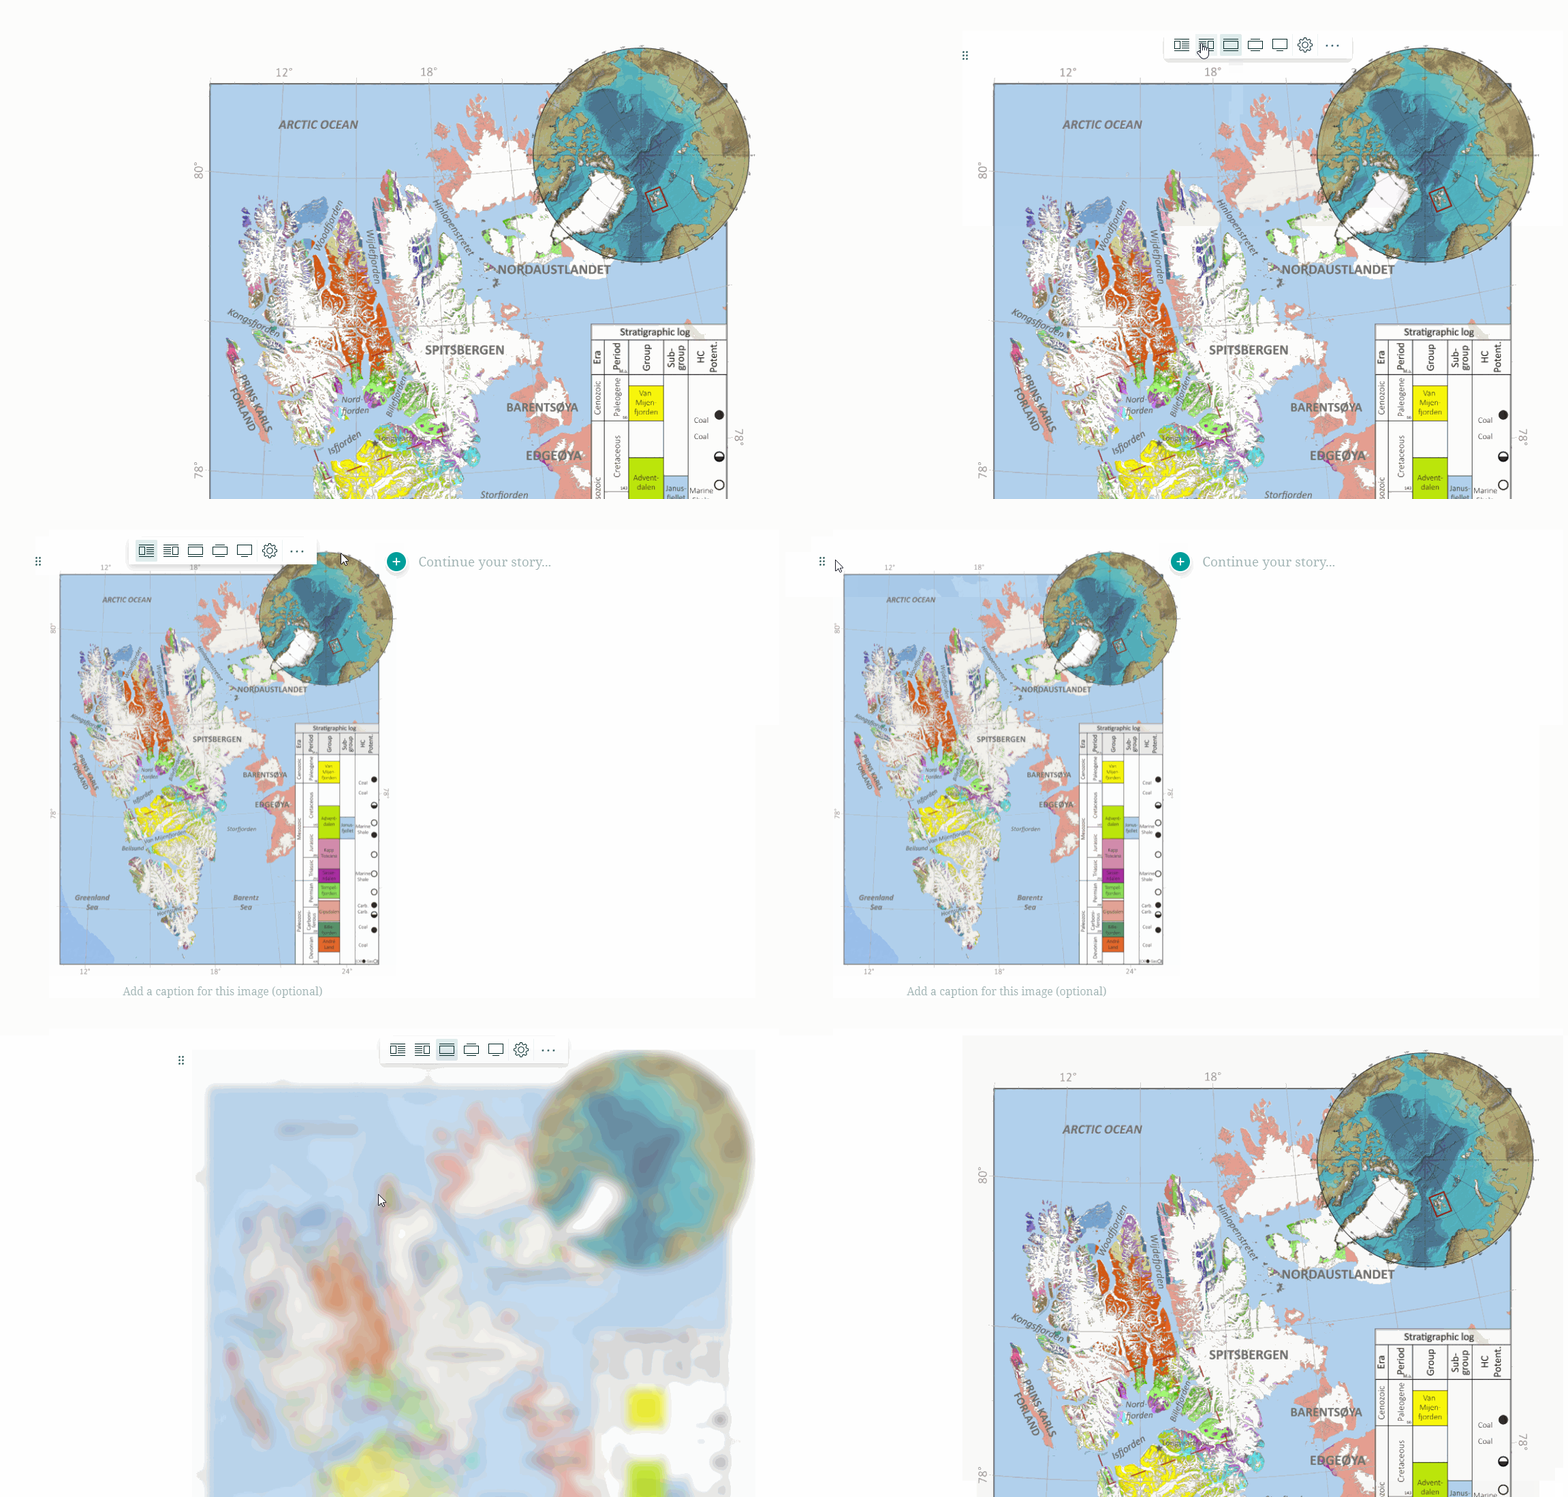
After adding some content (e.g. an image), when you highlight over it you get various options in the top part -these will change depending on what you added-. You can also reposition your content by moving your cursor over the left icon (which looks like 6 squares) and simply dragging it.
Embedding your geomodel#
Story Maps makes it easy to include your geomodel, just click to “Embed”.
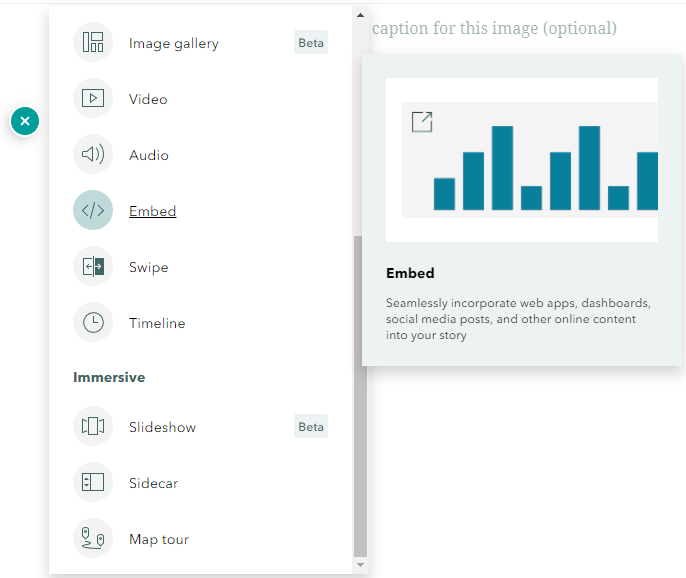
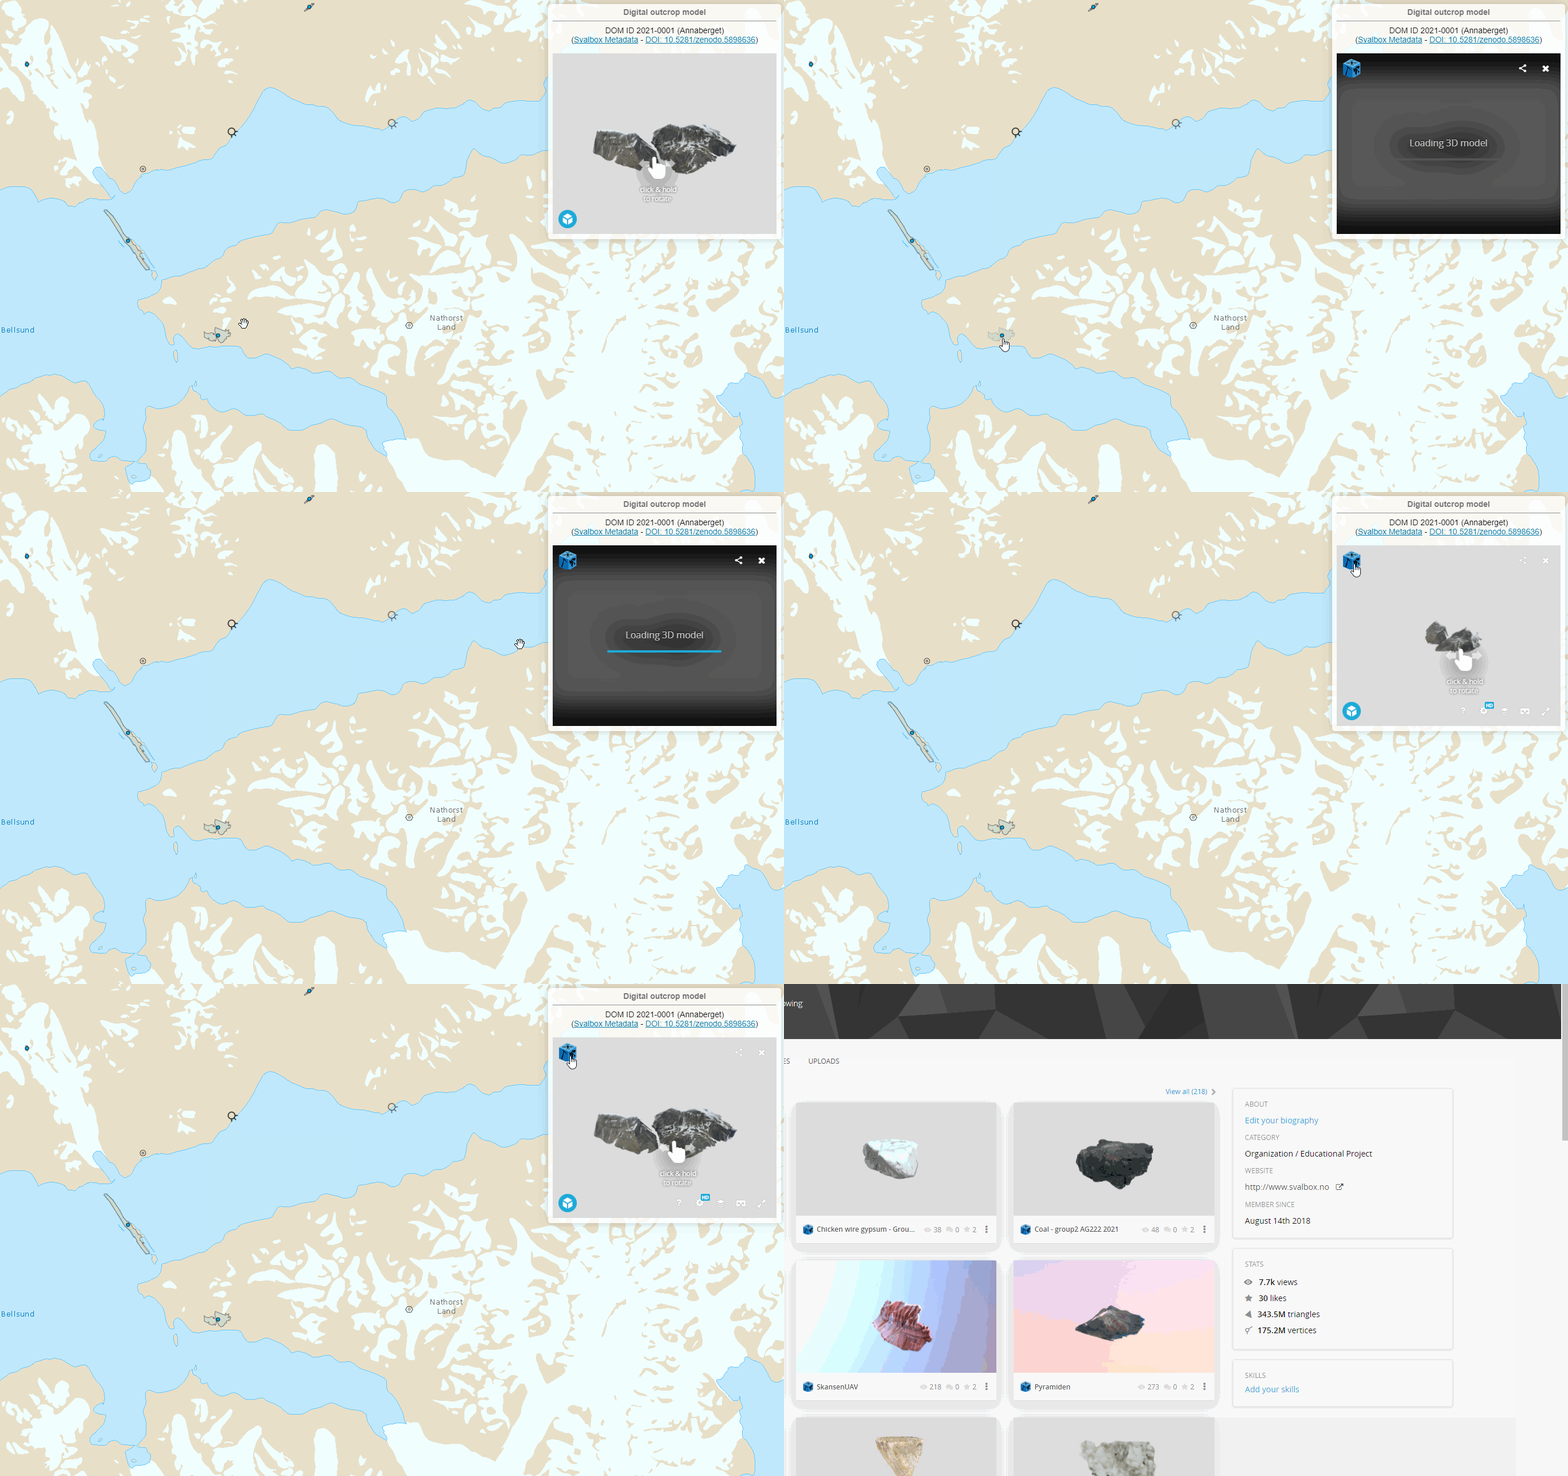
However, getting the URL to your model is a little trickier. For this step, we can go to https://www.svalbox.no/map/, open your assigned model and click the icon in the bottom left. By doing this, the model will open in Sketchfab https://sketchfab.com.
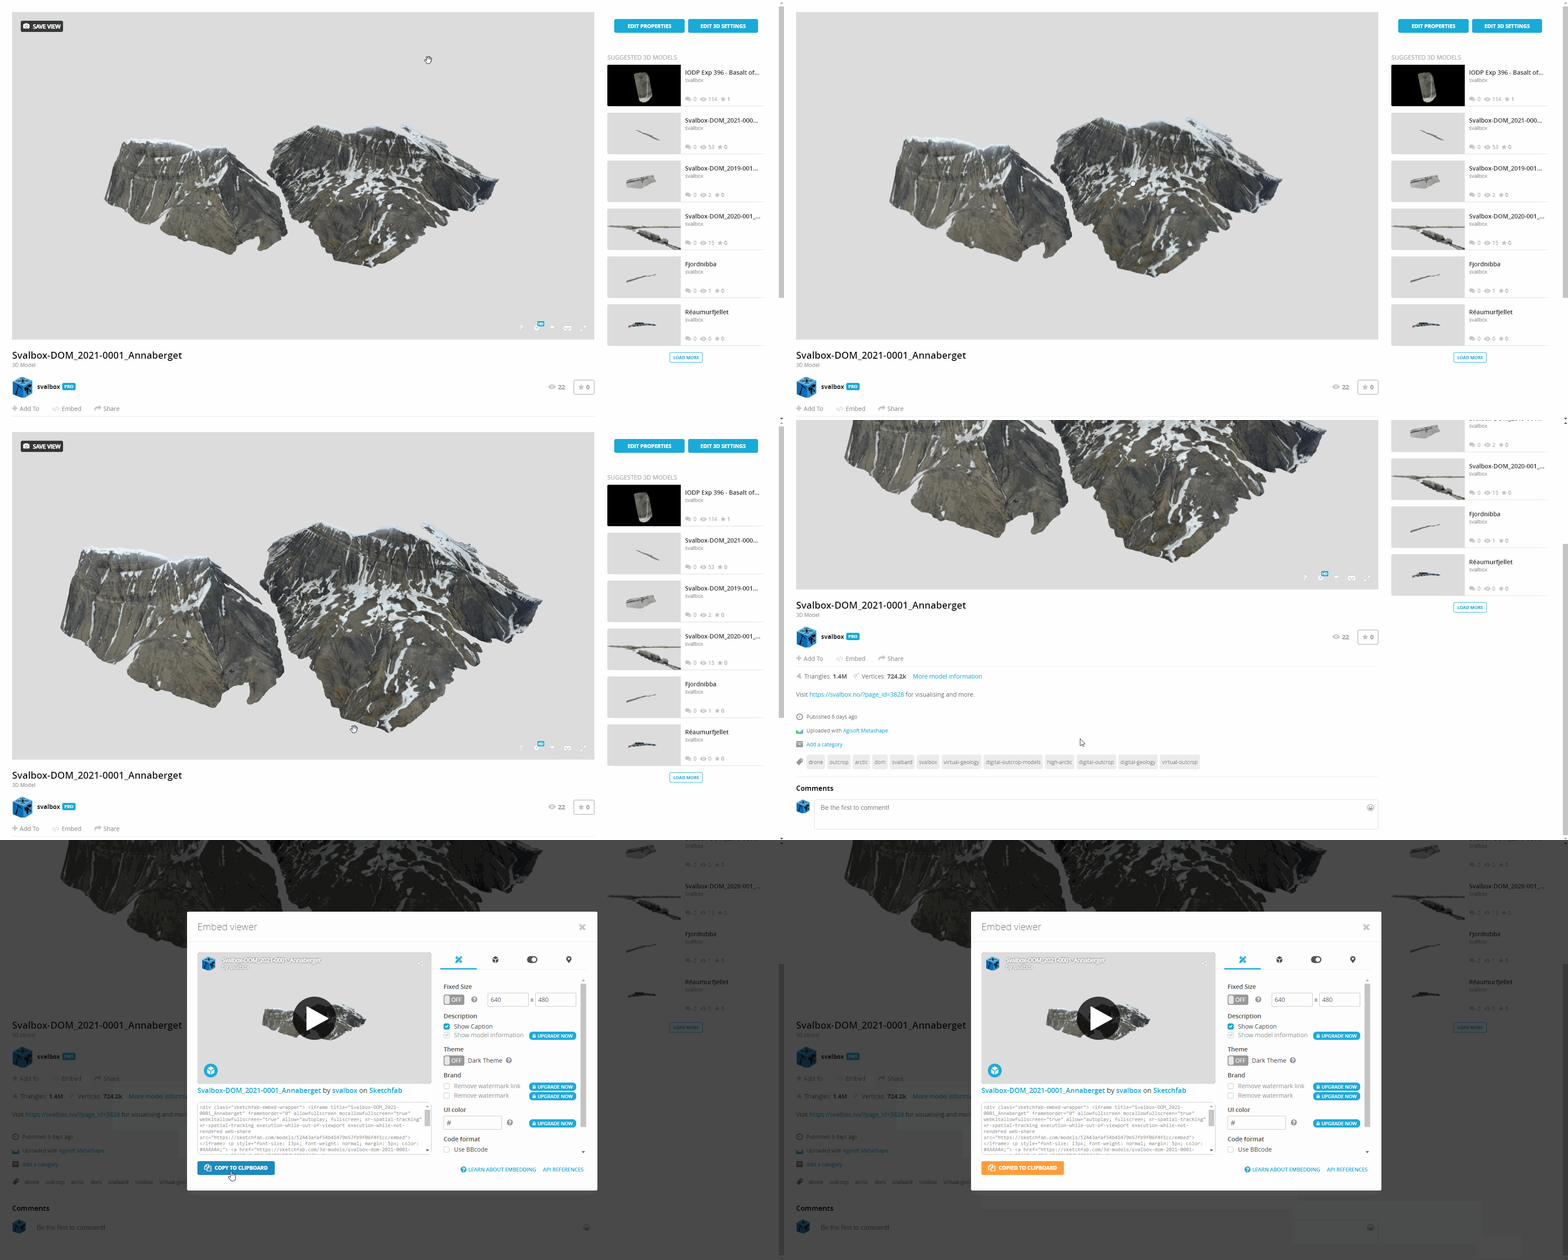
In Sketchfab we can scroll down and click “embed” (below right image). You have a few options for how the model will display in story maps. The default settings are fine, but feel free to change things if you wish (make sure it is iframe format). Simply click on the text box at the bottom and copy the box’s contents.
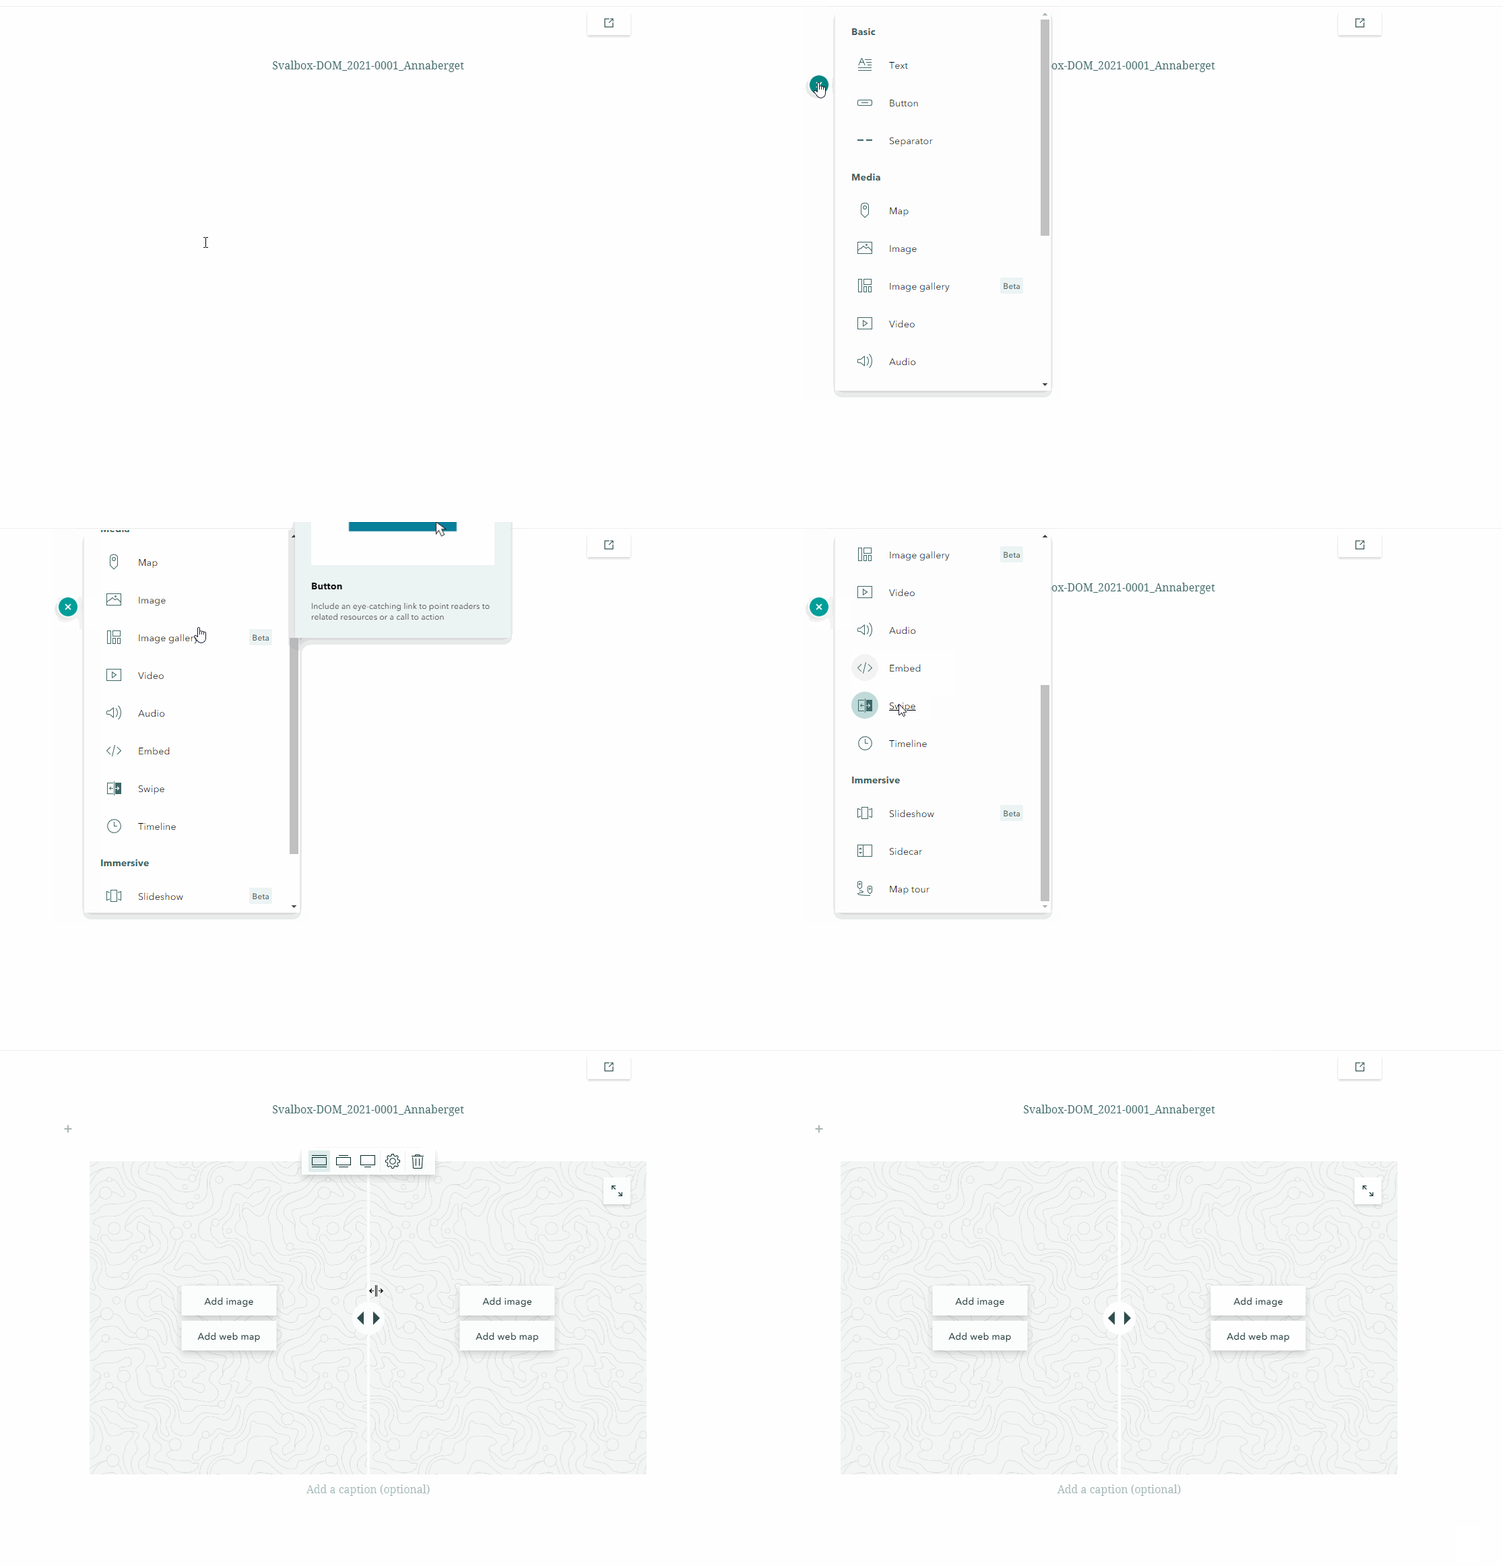
Go back to story maps and paste the URL link. Click Add to finalize. Now the Svalbox model is embedded in your story!
Embedding a Photo sphere#
Copy the link from the 360 data layer in ArcGIS Story Maps into Pannellum, and then use the embed code.
Add a map slider#
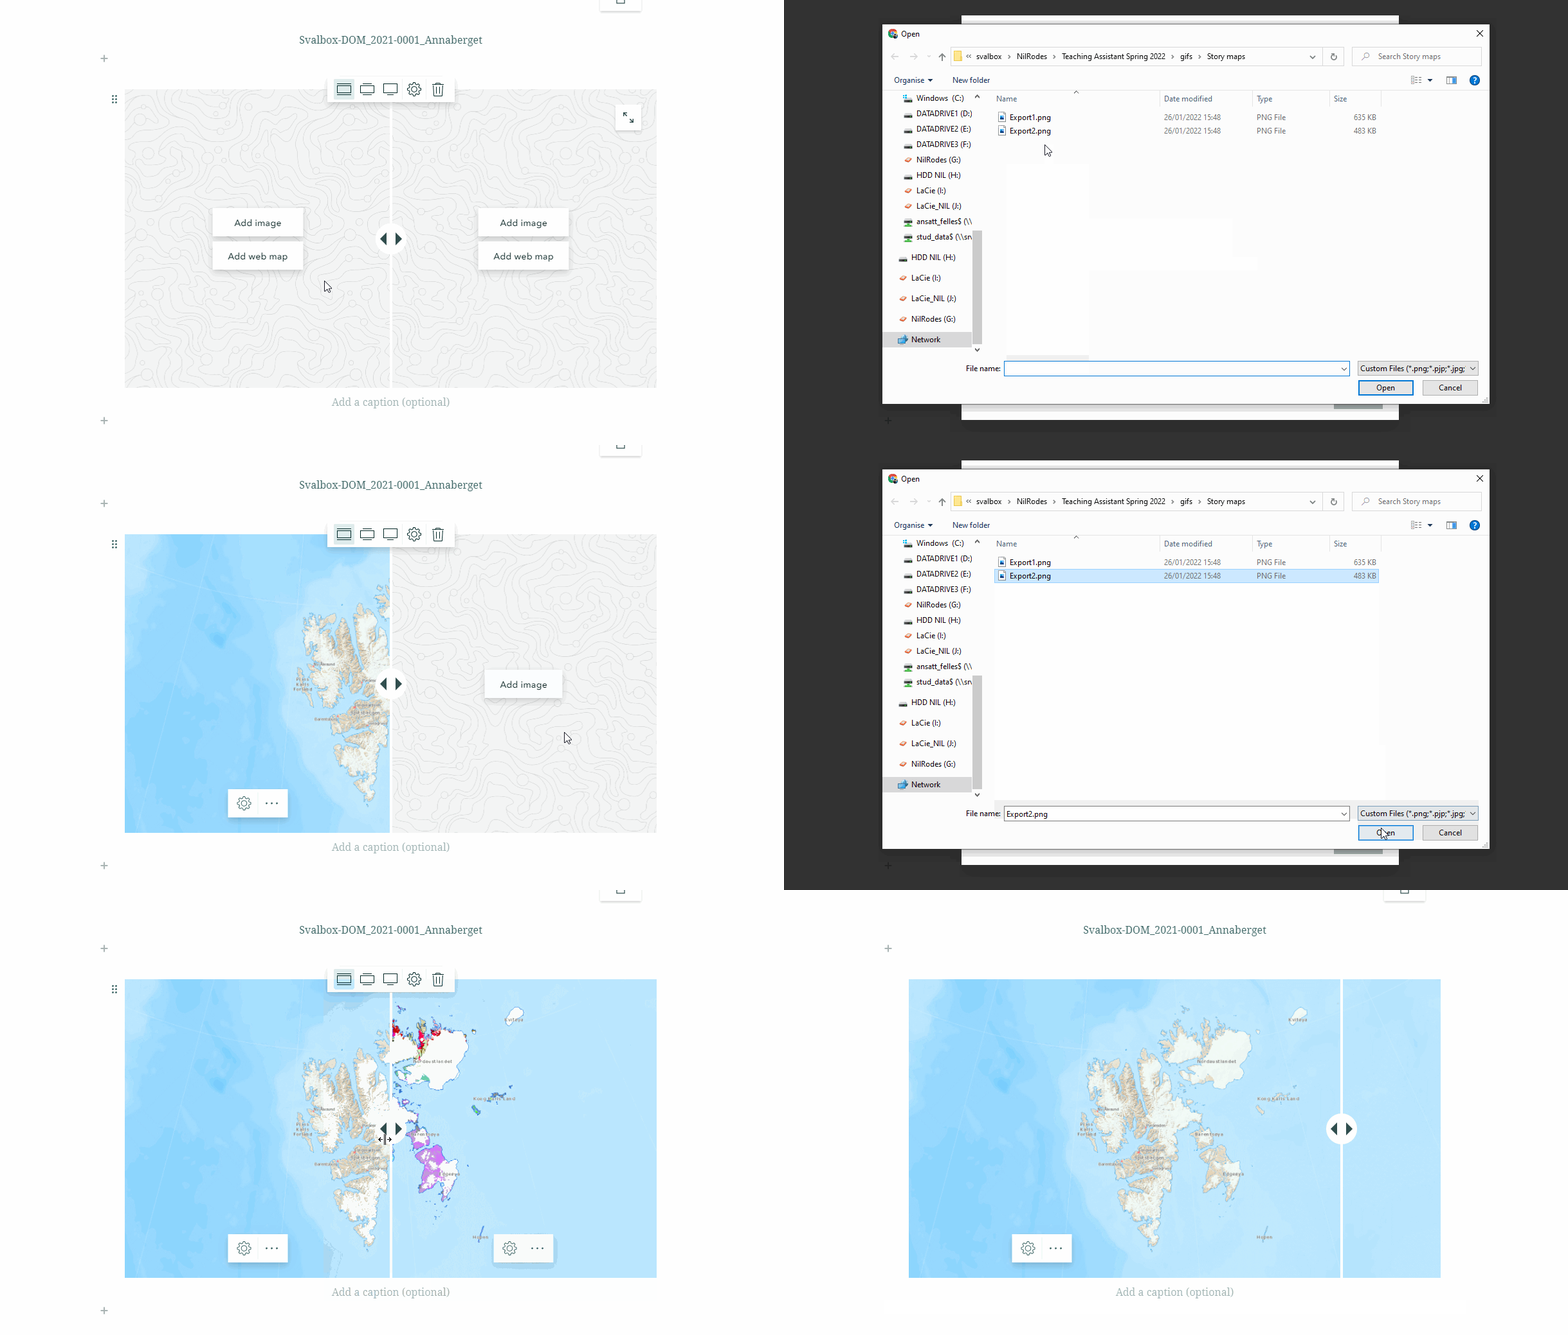
In StoryMaps you can add a “swipe” in your features. The easiest way to do it is by adding two images.
Warning
It is important to use maps (or whatever else you might want to add) in the exact same place and scale.
Tip
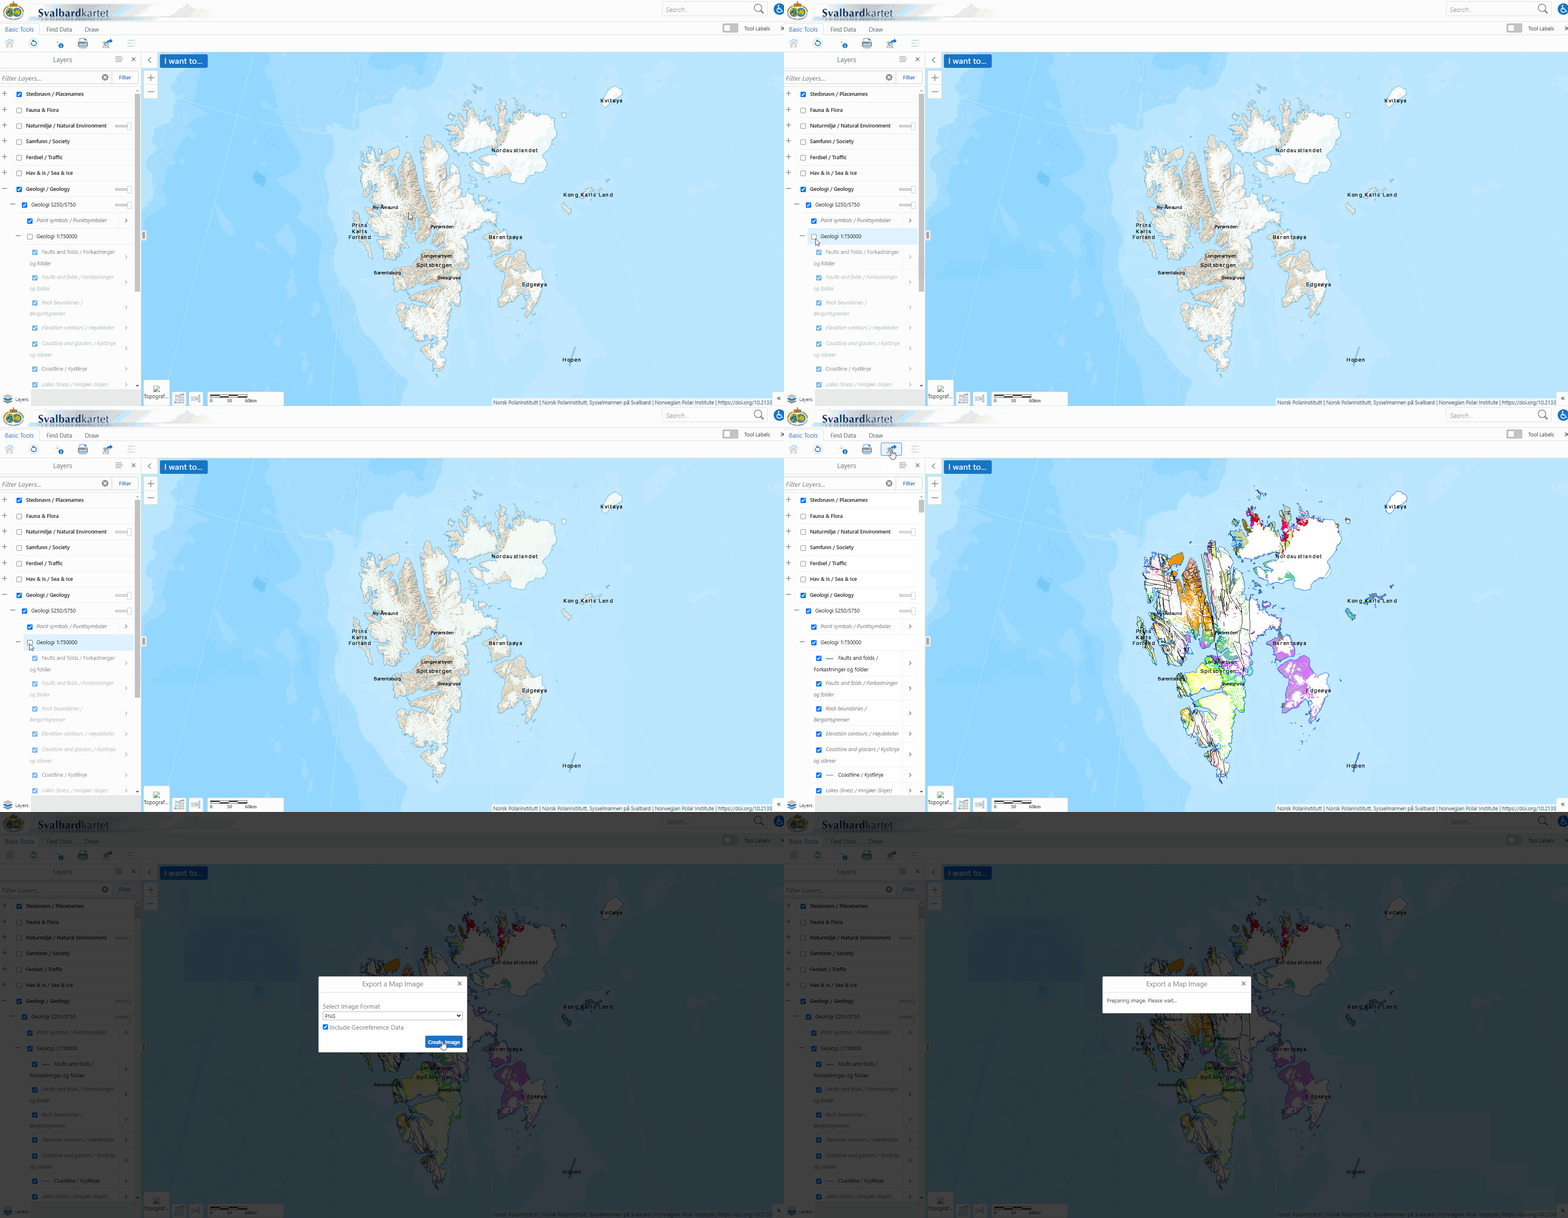
This is where your Svalbardkartet exporting is useful!
In SvalbardKartet https://geokart.npolar.no/Html5Viewer/index.html?viewer=Svalbardkartet, setup the map to the scale and position you want.
Simply turn on the relevant layers for your different maps in the swipe. Export the different maps and add them to your StoryMaps as images.
Finally, add the different images to StoryMaps.
Publishing#
When your work is finished, and you are ready to publish it, simply click the Publish button in the top right of your project. Choose “Everyone (Public)” when publishing.
Note
After publishing, you can still edit your work. Publishing simply makes others can view it.
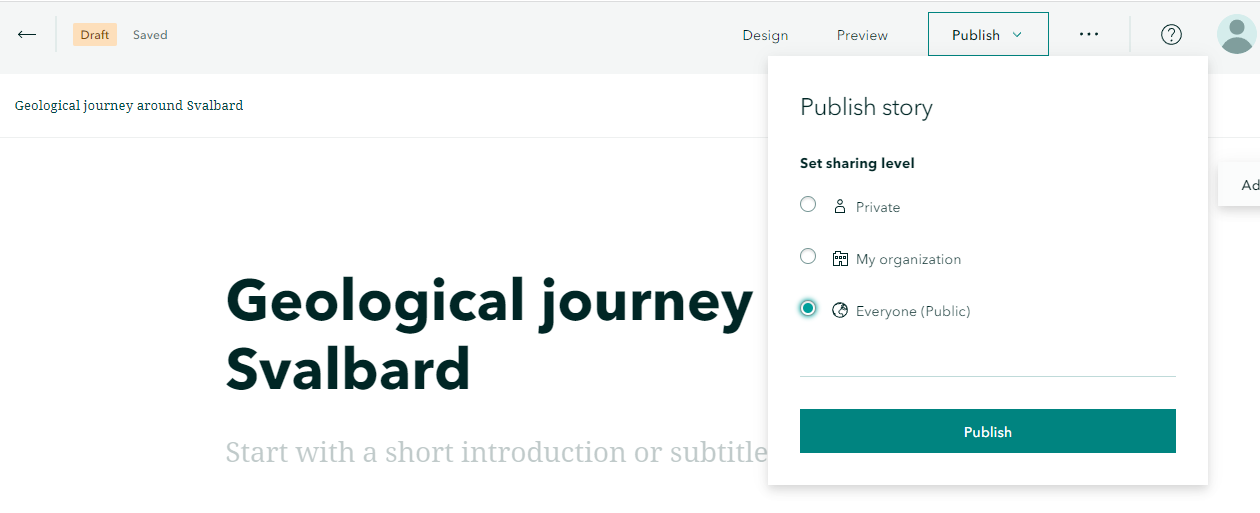
You can also choose to preview it beforehand if you want to see how your story will look to viewers. It’s the button to the left of “publish”.
Play around and see what looks good! Being creative is good!
